Your privacy is important to us. We don't use third-party cookies or trackers and we don't store your personal information.


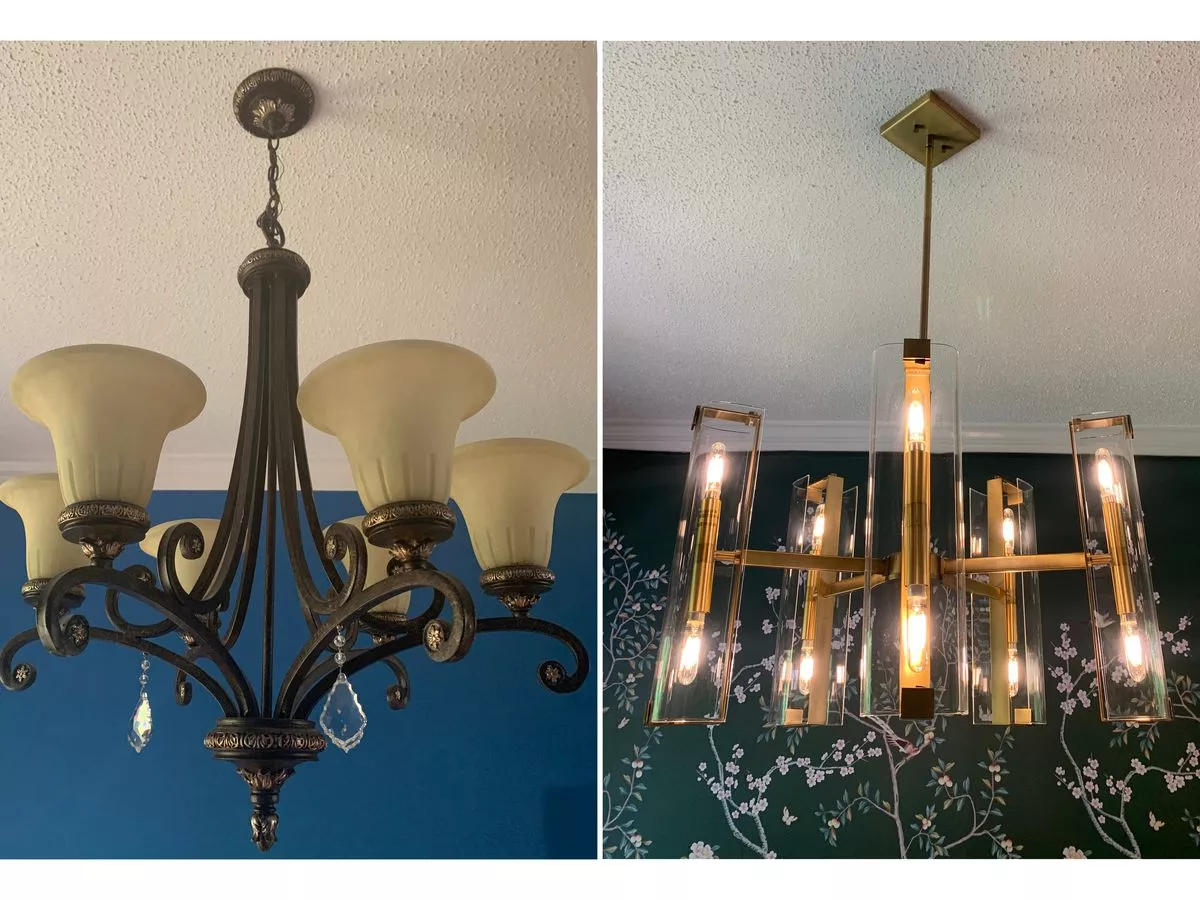
Updating the light fixtures in your home can be a simple and cost-effective way to modernize the space, increase the value of your home, and create a more inviting atmosphere. However, before starting this project, it is important to consider the pros and cons of upgrading your lighting fixtures. On one hand, new light fixtures can bring a fresh and modern look to your home, and can even improve energy efficiency if you choose LED or other energy-efficient options. On the other hand, upgrading your light fixtures can be costly, time-consuming, and may require some basic knowledge of electrical wiring. In this guide, we will walk you through the process of replacing old and outdated light fixtures with new, modern ones, and help you make an informed decision on whether or not to proceed with the project.
Step 1: Assess your current light fixtures
Before you begin, take a look around your home and assess the current light fixtures. Make note of the number of fixtures, their location, and the style. This will help you determine how many new fixtures you need to purchase and where they should be placed. Consider the overall style of your home, whether it is a traditional, modern, or contemporary, and choose fixtures that complement that style.
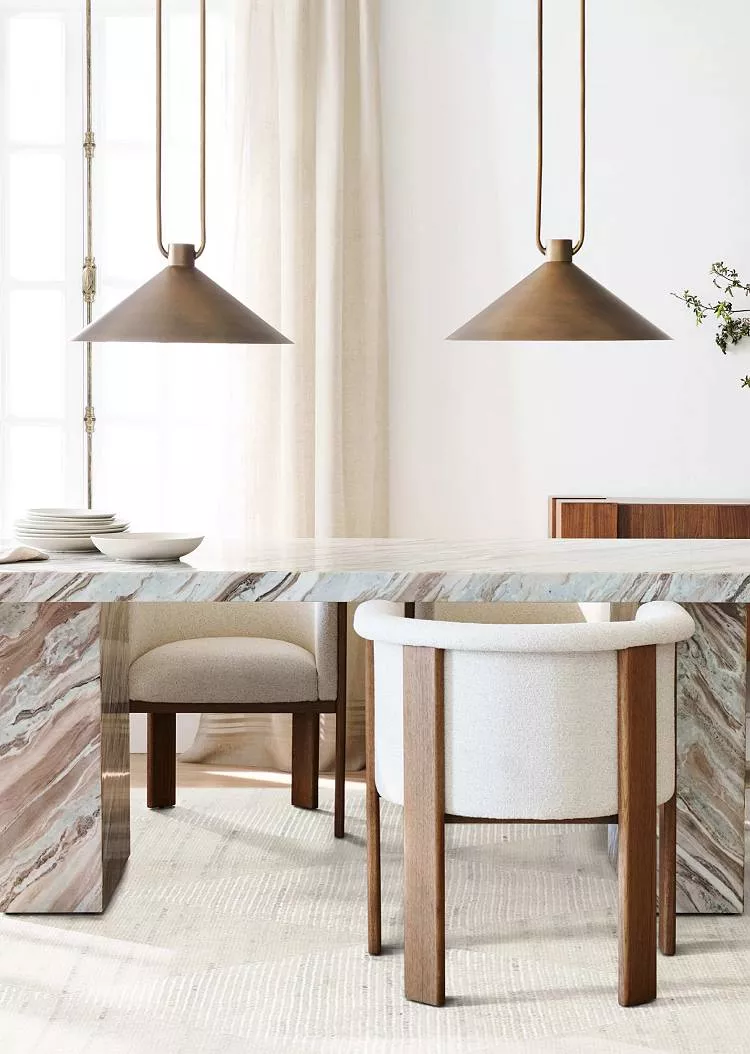
Step 2: Choose the new light fixtures
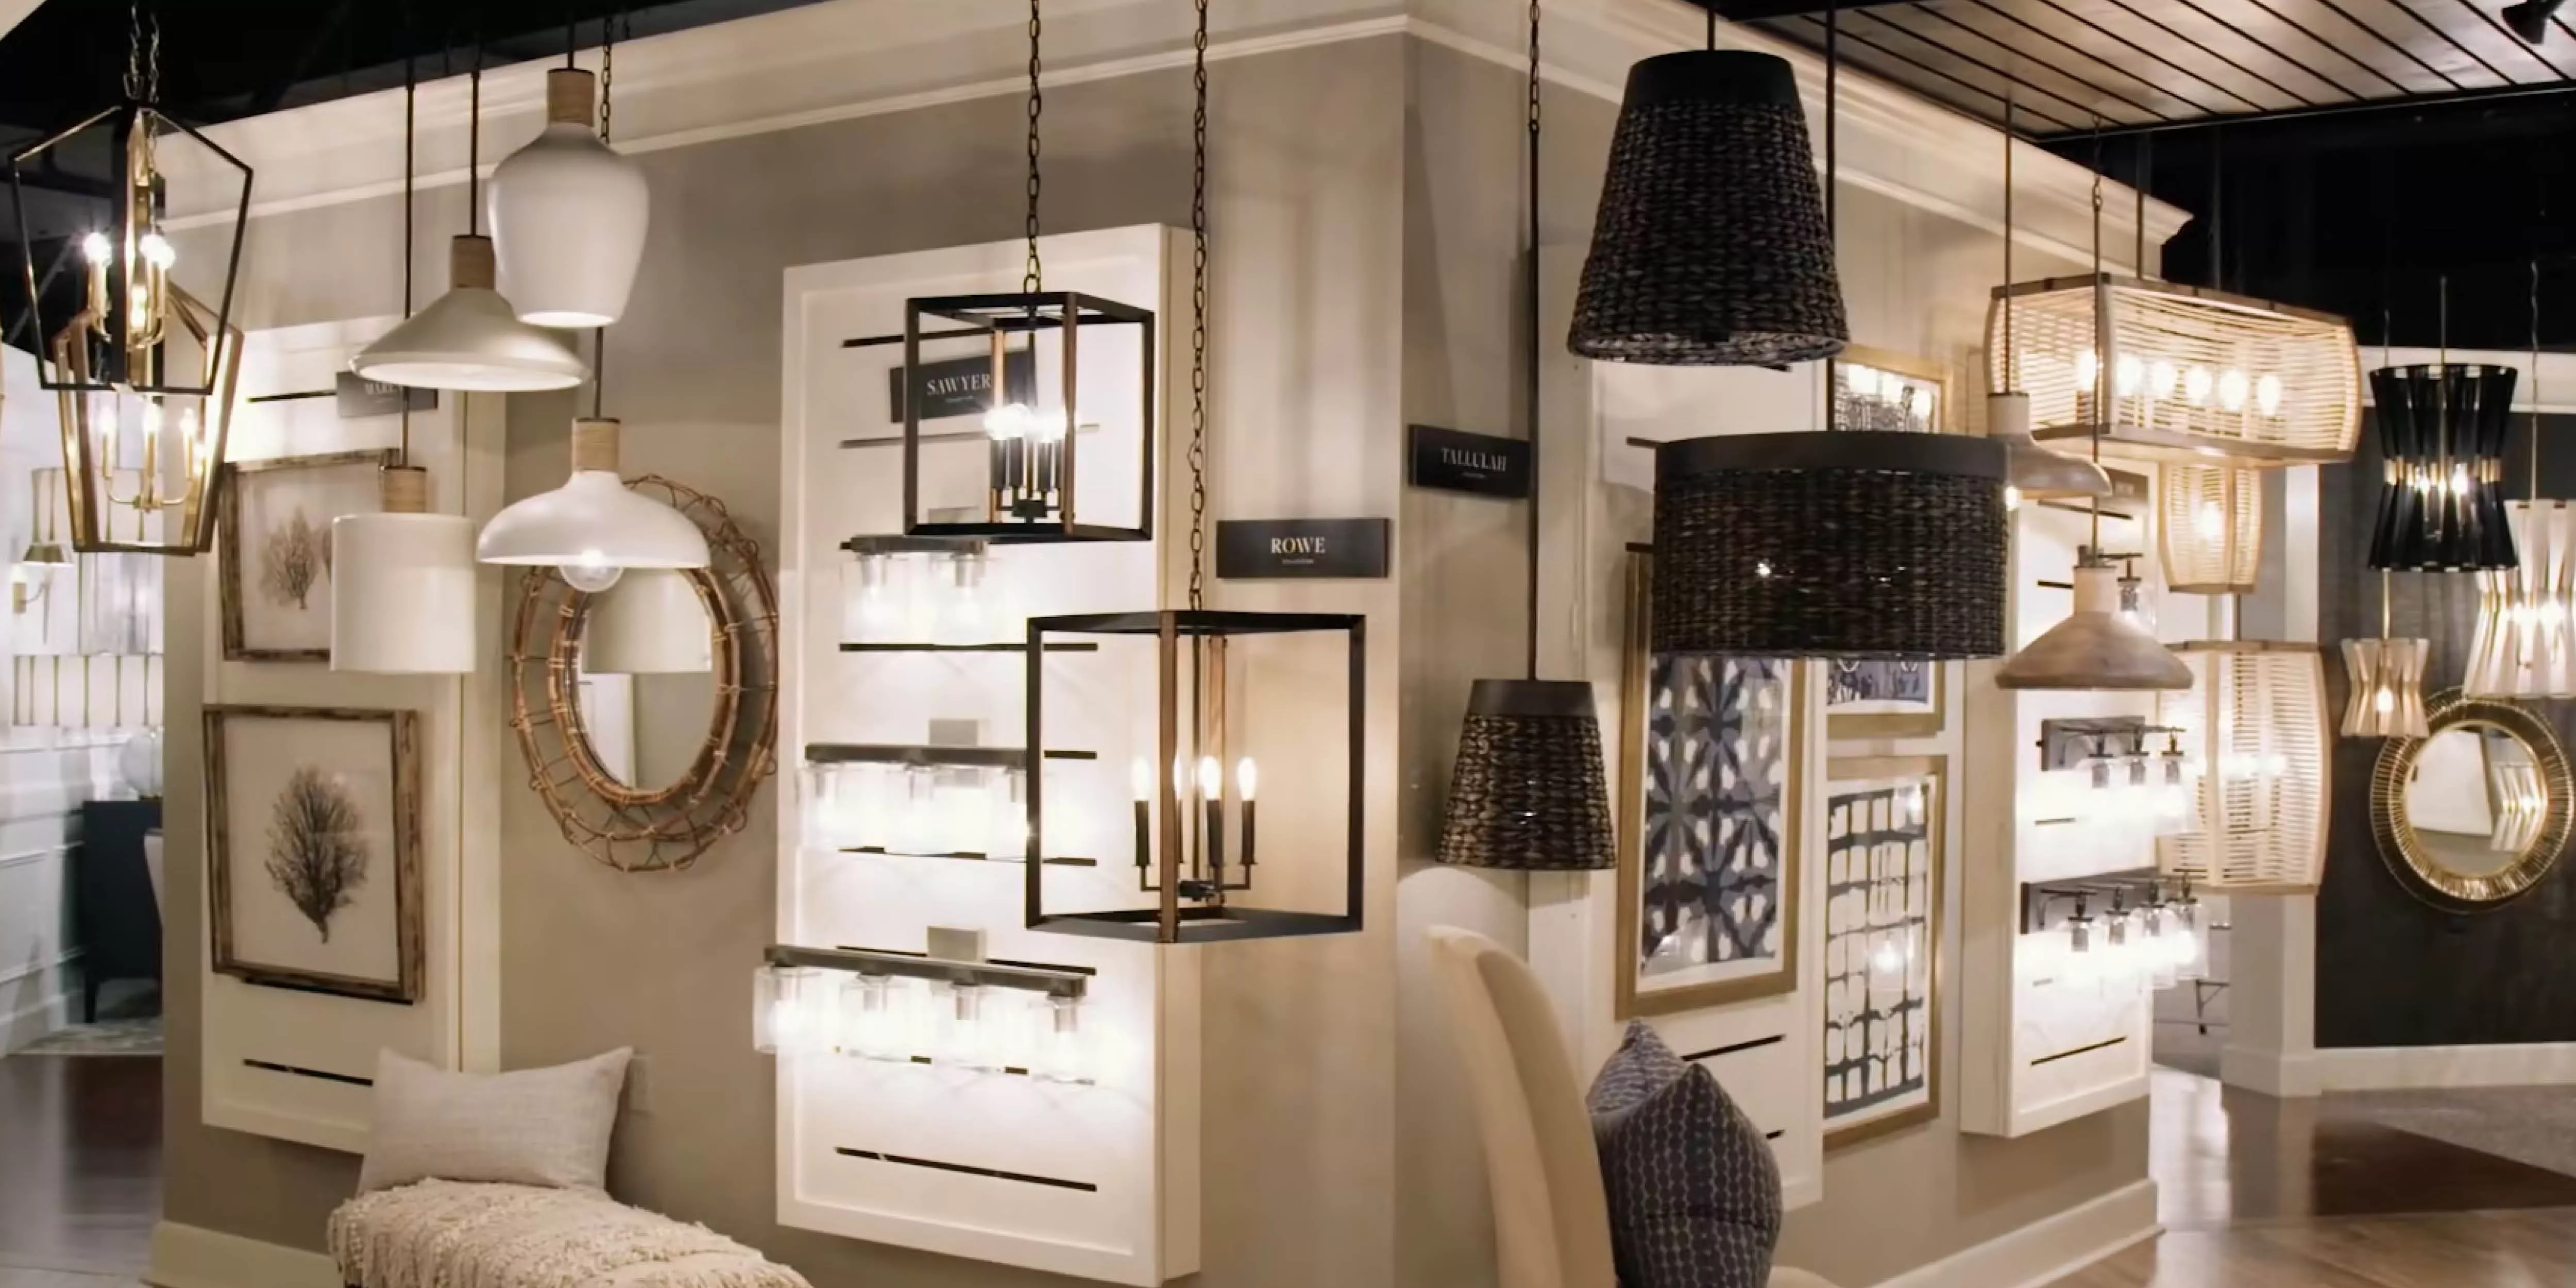
Next, choose the new light fixtures that you would like to install. There are many different styles of light fixtures available, from modern and contemporary to traditional and vintage. If you're looking for energy-efficient options, consider LED light fixtures which are known for their energy efficiency and long lifespan.

Step 3: Measure the space
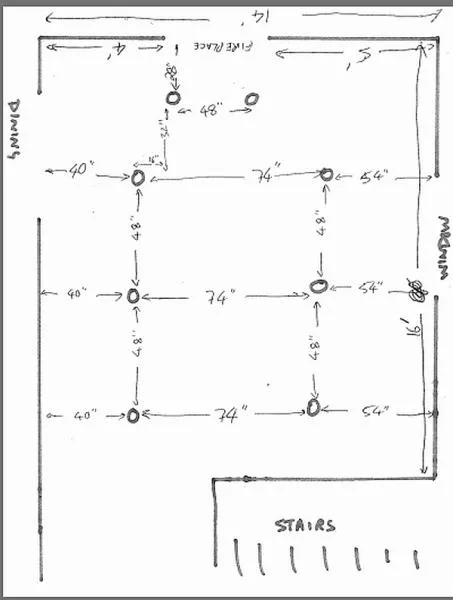
Measure the space where the new light fixtures will be installed. This will ensure that you purchase the correct size of fixture for the space. Be sure to check the specifications of the light fixtures you're planning to purchase, to make sure they will fit in the space you have. Make a simple map to ensure you get everything right the first time.
Step 4: Purchase the new light fixtures
Once you have chosen the new light fixtures and measured the space, purchase them. Be sure to purchase the correct size and style of fixtures for the space. It's recommended to buy the light fixtures from a reputable retailer and make sure the lights come with a warranty.
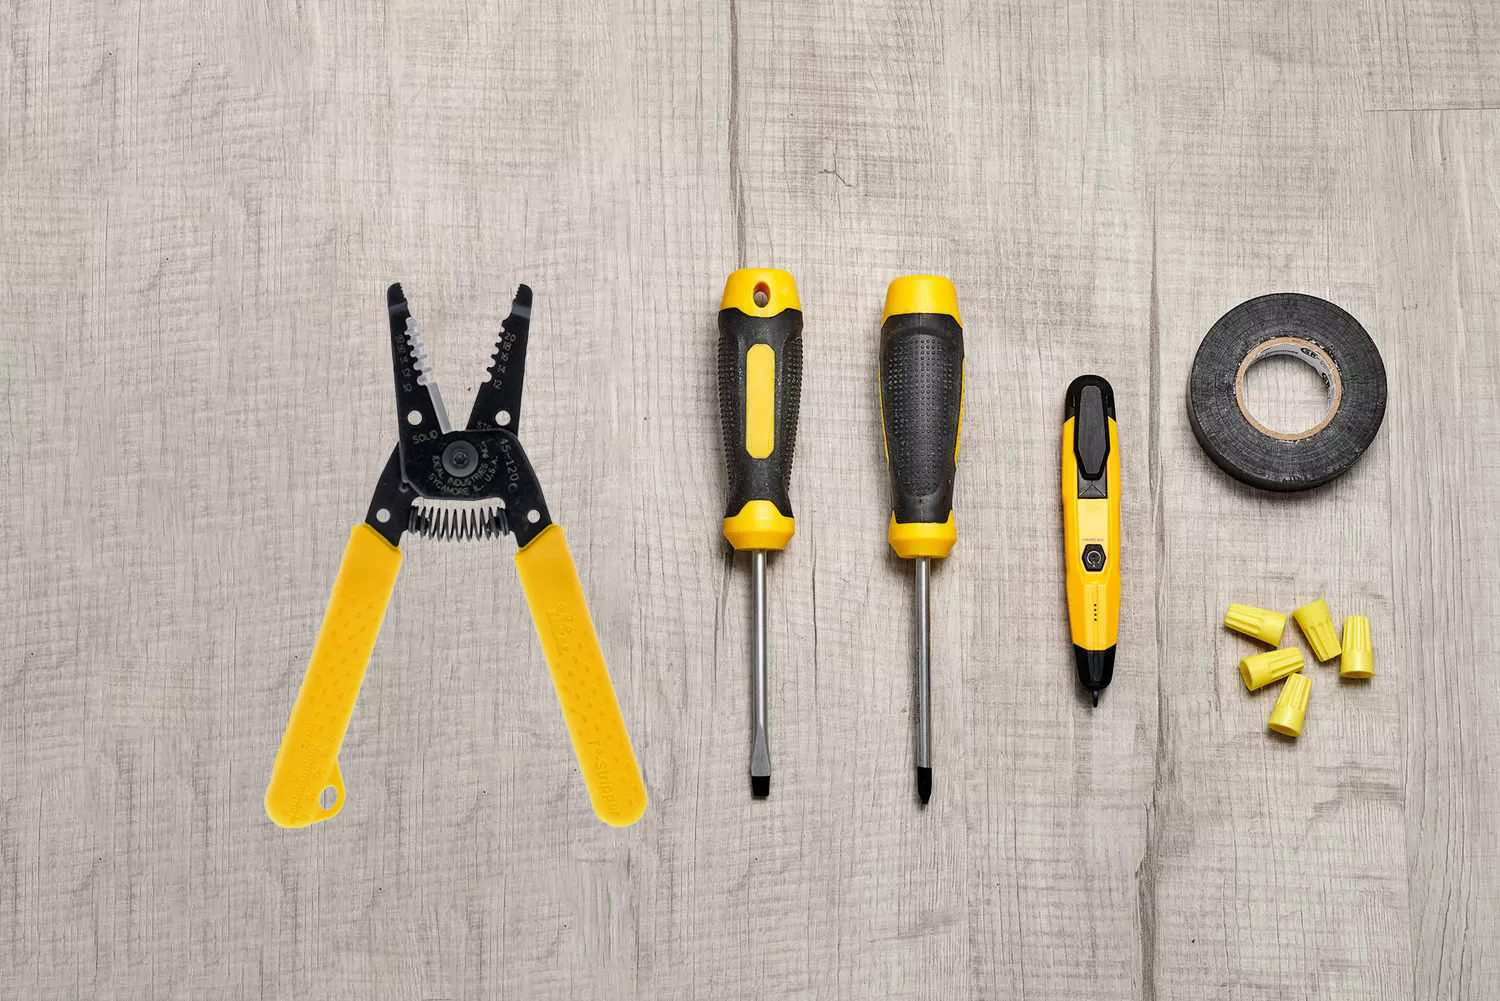
Step 5: Gather the necessary tools
Gather all the tools you will need for the installation, including a ladder, screwdrivers, wire stripper, wire nuts, and electrical tape. Make sure you have all the necessary tools before starting the project to avoid any interruptions.
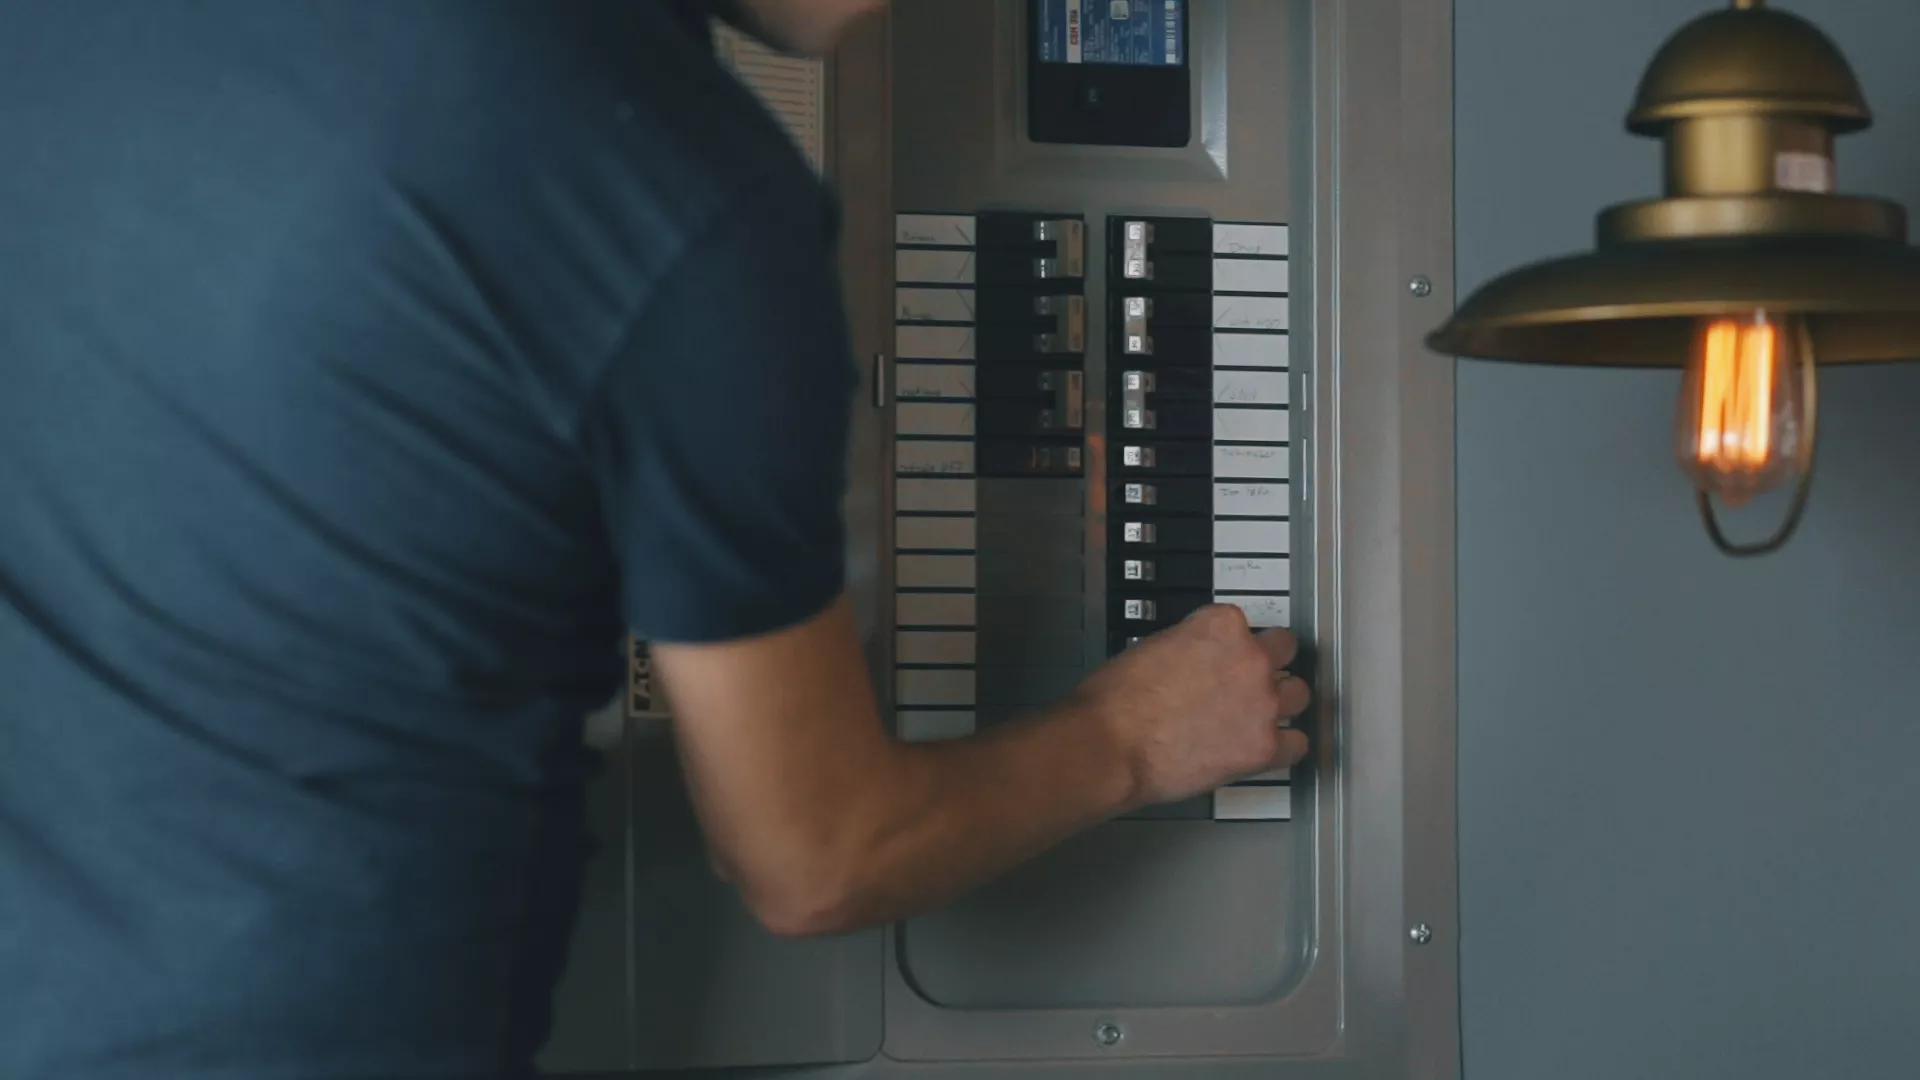
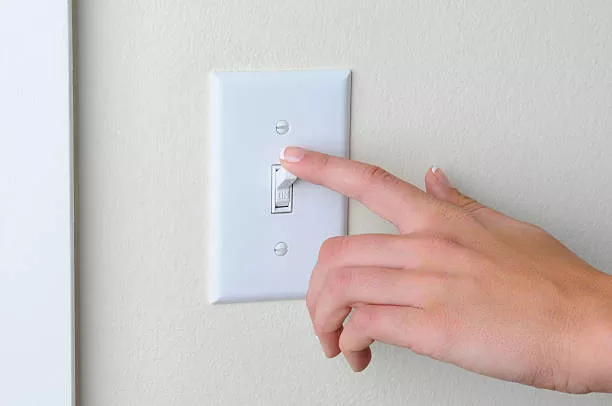
Step 6: Turn off the power
Before you begin the installation, turn off the power to the light fixtures at the circuit breaker. This is an important safety step to prevent electrocution. To be extra safe, use a voltage tester to confirm that the power is off before starting the installation.
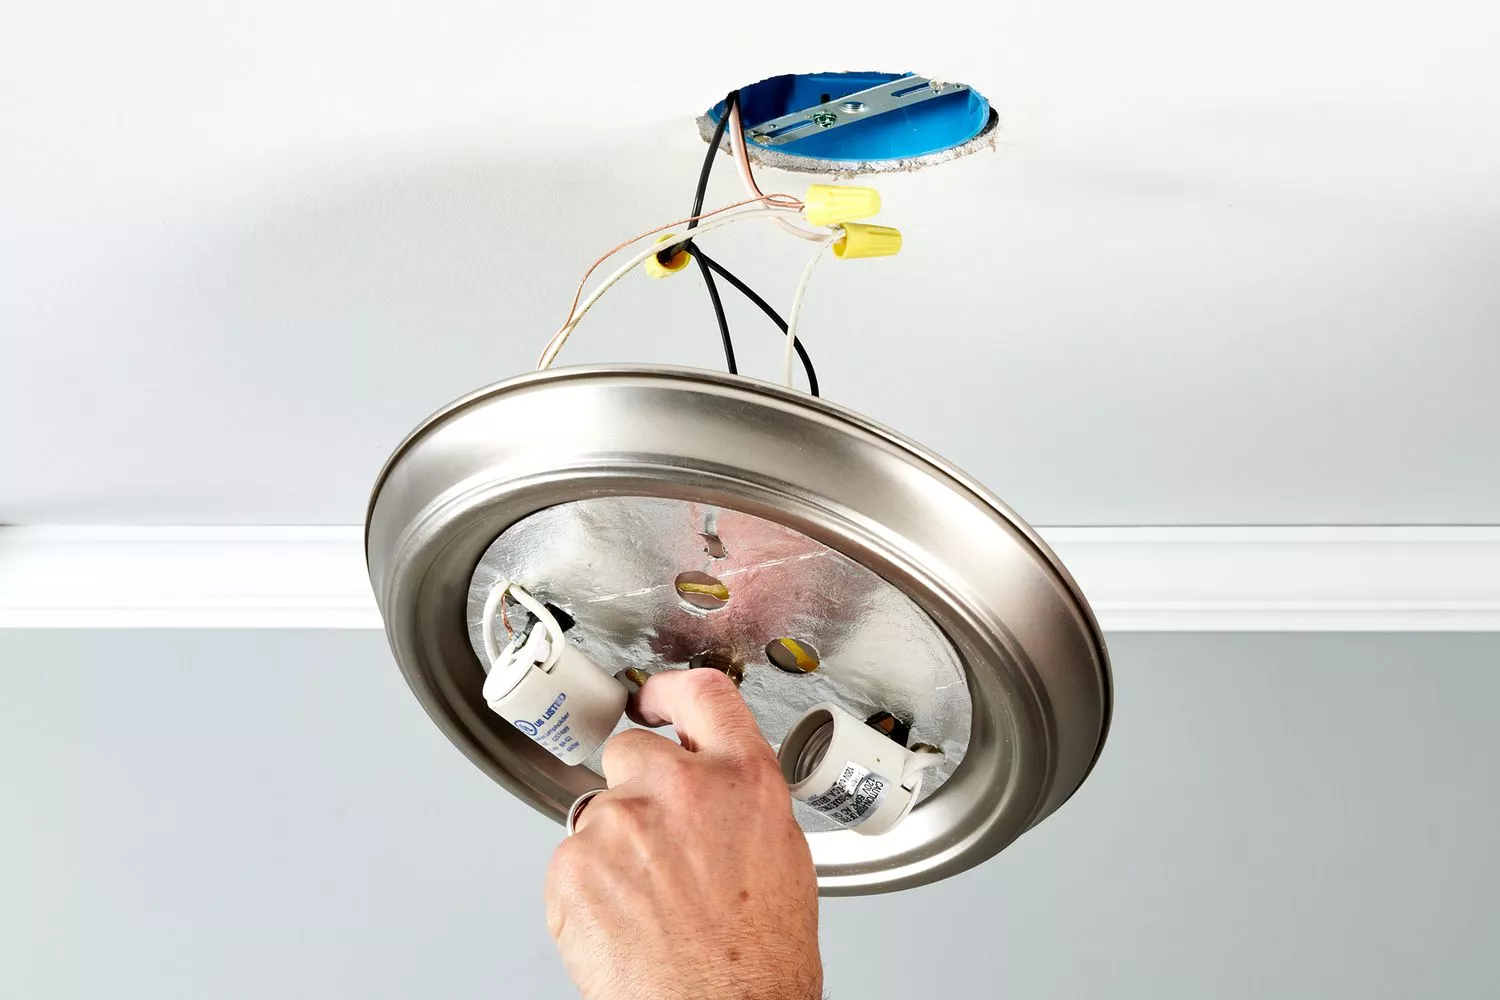
Step 7: Remove the old light fixtures
Remove the old light fixtures by unscrewing the mounting hardware and disconnecting the electrical wires. Be sure to save the mounting hardware for the new fixtures. Take a picture or make a diagram of the wiring to reference when installing the new light fixtures.
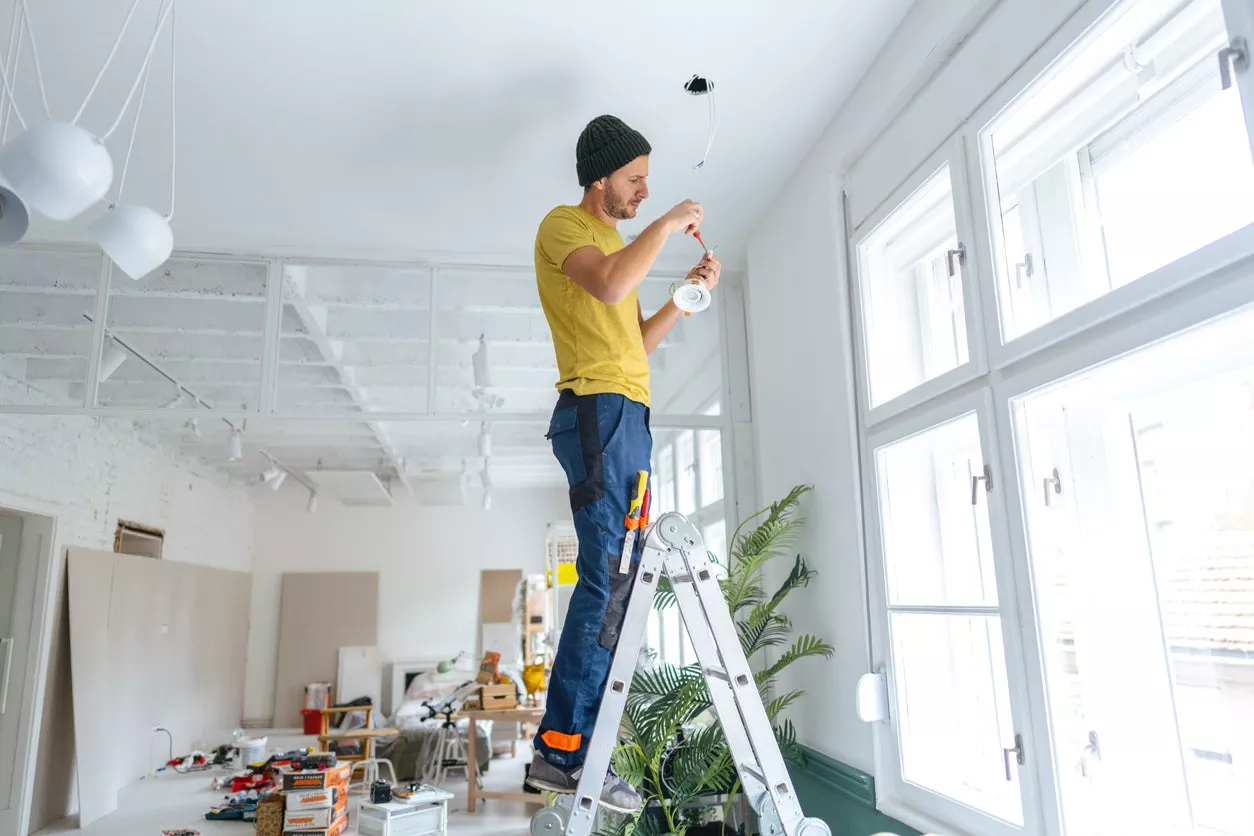
Step 8: Install the new light fixtures
Install the new light fixtures by following the instructions provided by the manufacturer. This will typically involve attaching the mounting hardware to the new fixtures and connecting the electrical wires. Be sure to use the correct wire nuts and electrical tape when connecting the wires. If you're unsure about the wiring, it's best to consult an electrician.
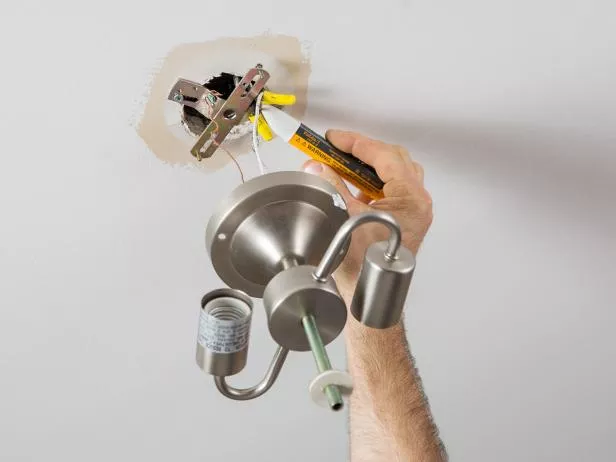
Step 9: Test the new light fixtures
Once the new light fixtures are installed, turn the power back on and test the fixtures to ensure they are working properly. Make sure to test all the lights and check for any issues.
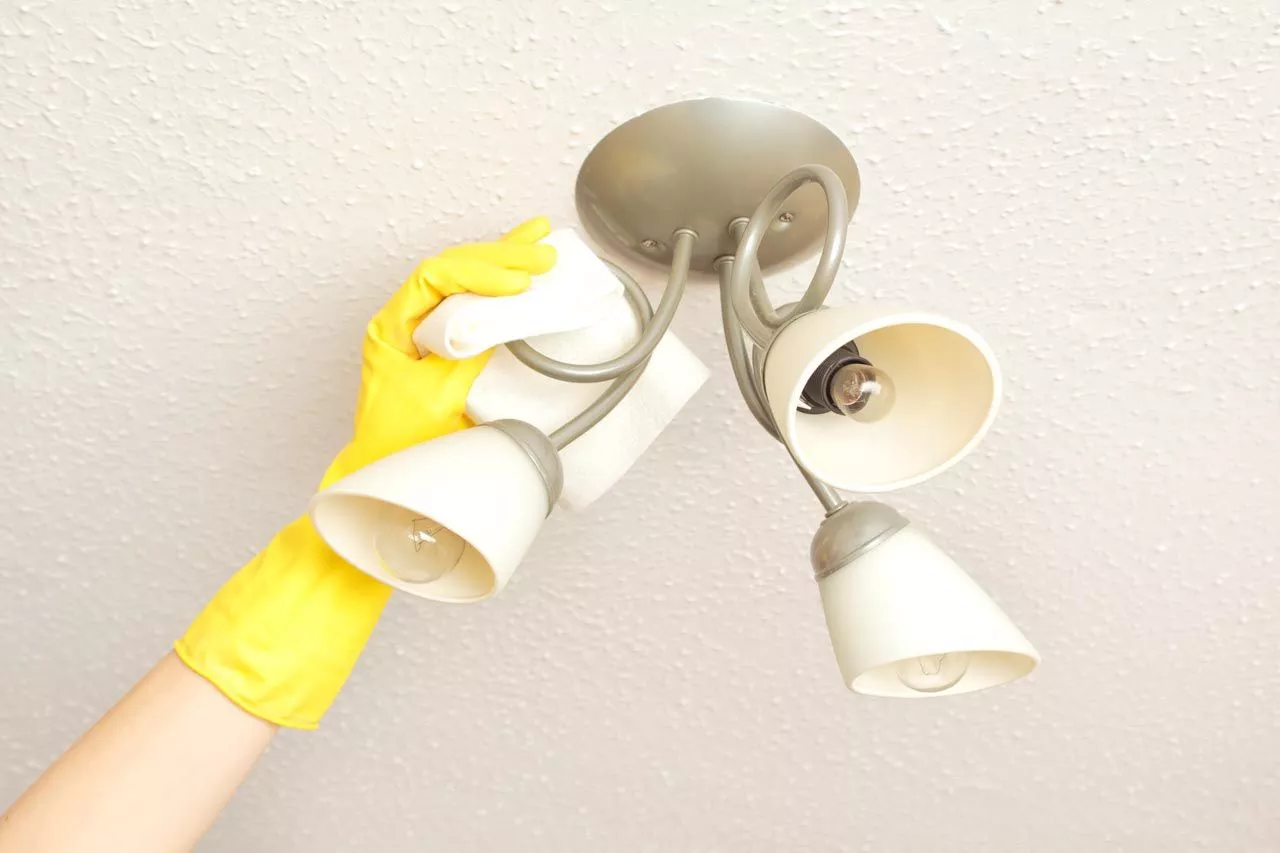
Step 10: Clean up
Remove any debris and clean up the area. It is important to clean hand oils off the lighting fixture after installing because the oils can cause damage to the finish of the fixture over time. The oils can also attract dust and dirt, which can make the fixture look dirty and less attractive. In addition, if the oils are not cleaned off, they can also make it difficult to clean the fixture in the future, as the oils can make it more difficult for dust and dirt to be removed. Cleaning the hand oils off the lighting fixture after installation will ensure that the fixture maintains its aesthetic appearance and prolongs its lifespan.
Step 11: Repeat the process
Repeat the process for all of the light fixtures in your home that you want to replace.
Step 12: Enjoy your new light fixtures
Stand back and enjoy your new light fixtures! They will bring a fresh, modern look to your home, and increase its value. You may also want to consider adding dimmer switches to the new light fixtures, which will give you more control over the lighting in your home, and create a more comfortable and inviting atmosphere.
Updating the light fixtures in your home is a simple and cost-effective way to modernize the space and increase its value. By following this step-by-step guide, you can easily replace old and outdated light fixtures with new, modern ones. It's important to have basic knowledge of electrical wiring, and to check your local building codes and regulations to ensure that the project is up to code. With the new light fixtures, your home will look fresh, modern and more valuable. And with the added convenience of dimmer switches, you'll be able to create the perfect lighting for any occasion.